A garage is one of the most versatile spaces in a home. It can serve as a parking area, storage room, workshop, or even a hobby space. However, garages often become a catch-all location for items that no longer have a place inside the house. Over time, boxes, tools, seasonal decorations, old furniture, and miscellaneous belongings can pile up, making the space difficult to use.
If your garage has become cluttered and disorganized, a thorough cleanout can help restore order and functionality. The good news is that you don’t have to tackle the entire project at once. With a clear plan and a practical checklist, you can transform your garage into a clean, organized, and efficient space.
This ultimate garage cleanout checklist will guide you through every step of the process.
Why a Garage Cleanout Is Important
Many homeowners postpone garage organization because the task seems overwhelming. However, a clean and organized garage offers several benefits:
- Creates more usable storage space
- Improves home safety
- Makes it easier to find tools and equipment
- Protects valuable belongings from damage
- Reduces stress caused by clutter
- Enhances the overall appearance of your property
A well-organized garage can also increase the functionality and value of your home.
Step 1: Set Aside Enough Time
Before you begin, schedule adequate time for the project. Depending on the size of your garage and the amount of clutter involved, a complete cleanout may take several hours or even an entire weekend.
Avoid rushing the process. Having enough time allows you to make thoughtful decisions about what to keep and what to remove.
Step 2: Gather Your Supplies
Having the right supplies on hand can make the cleanout process much smoother.
Consider gathering:
- Trash bags
- Cardboard boxes
- Storage bins
- Labels and markers
- Cleaning supplies
- Work gloves
- Broom and dustpan
- Vacuum cleaner
Being prepared helps prevent interruptions once the cleanout begins.
Step 3: Empty the Garage
One of the most effective ways to organize a garage is to remove everything from the space.
Moving items outside or into a temporary staging area allows you to:
- See the full extent of the clutter
- Clean the garage thoroughly
- Evaluate each item individually
While this step may seem intimidating, it creates a fresh starting point for the organization process.
Step 4: Sort Items Into Categories
As you remove items from the garage, sort them into categories.
Common categories include:
Keep
Items you regularly use and genuinely need.
Donate
Items that are still functional but no longer useful to you.
Recycle
Materials that can be processed through local recycling programs.
Trash
Broken, damaged, or unusable items that should be discarded.
Using clearly labeled boxes or designated areas can help keep everything organized.
Step 5: Identify Items You No Longer Need
Many garages contain items that have not been used in years.
Ask yourself the following questions:
- Have I used this item in the last year?
- Does it serve a useful purpose?
- Would I buy this again today?
- Is it in good condition?
If the answer is no, it may be time to let the item go.
Being honest during this stage can significantly reduce clutter.
Step 6: Dispose of Hazardous Materials Properly
Garages often contain materials that require special disposal.
Examples include:
- Paint
- Motor oil
- Pesticides
- Batteries
- Cleaning chemicals
- Automotive fluids
Do not place these items in regular household trash.
Instead, check local regulations and locate approved collection centers for hazardous waste disposal.
Proper disposal protects both the environment and public safety.
Step 7: Deep Clean the Garage
With the garage emptied, take advantage of the opportunity to clean thoroughly.
Tasks may include:
- Sweeping floors
- Removing cobwebs
- Dusting shelves
- Cleaning windows
- Washing surfaces
- Vacuuming corners and crevices
A clean environment makes it easier to maintain organization in the future.
Step 8: Evaluate Storage Needs
Before returning items to the garage, consider how you want the space to function.
Think about:
- Parking vehicles
- Tool storage
- Sports equipment
- Seasonal decorations
- Gardening supplies
- Workshop areas
Understanding your priorities helps determine the best storage solutions.
Step 9: Install Smart Storage Solutions
Effective storage can maximize available space and reduce future clutter.
Popular garage storage options include:
Wall-Mounted Shelving
Shelves keep items off the floor and make them easier to access.
Pegboards
Ideal for organizing tools and frequently used equipment.
Overhead Storage Racks
Useful for seasonal items that are only needed occasionally.
Storage Cabinets
Provide a clean appearance while protecting contents from dust.
Clear Storage Bins
Allow you to identify contents quickly without opening containers.
Investing in proper storage systems can dramatically improve organization.
Step 10: Organize by Frequency of Use
When returning items to the garage, place frequently used items in easily accessible locations.
For example:
- Daily-use tools should be within easy reach.
- Seasonal decorations can be stored on higher shelves.
- Emergency supplies should remain accessible.
Organizing based on usage helps improve efficiency and convenience.
Step 11: Label Everything
Labels are one of the simplest yet most effective organization tools.
Clearly label:
- Storage bins
- Shelves
- Cabinets
- Toolboxes
Labels help family members locate items quickly and encourage everyone to return belongings to their proper places.
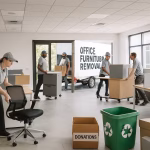
Step 12: Consider Professional Junk Removal
If your garage contains large volumes of unwanted items, professional junk removal services can save time and effort.
They can help remove:
- Old furniture
- Broken appliances
- Construction debris
- Large boxes
- Bulky household items
Professional assistance can make the cleanout process faster and more manageable.
Garage Cleanout Maintenance Tips
Once your garage is organized, maintaining it becomes much easier.
Consider adopting these habits:
Schedule Regular Cleanouts
Perform a mini-cleanout every few months.
Follow the One-In, One-Out Rule
When bringing in a new item, remove an old one.
Return Items Immediately
Put tools and equipment back in their designated locations after use.
Avoid Storing Unnecessary Items
Think carefully before placing new items in the garage.
Consistent habits help prevent clutter from returning.
Common Garage Items to Remove
Many homeowners discover they are storing unnecessary items such as:
- Broken furniture
- Expired paint cans
- Old electronics
- Worn-out sporting equipment
- Empty boxes
- Outdated holiday decorations
- Unused exercise equipment
- Rusted tools
Removing these items can free up significant space.
Conclusion
A garage cleanout may seem like a daunting project, but with a structured approach and a clear checklist, it becomes much more manageable. By sorting belongings, removing unnecessary items, installing effective storage solutions, and maintaining good organizational habits, you can transform your garage into a clean and functional space.
The benefits extend beyond appearance. A well-organized garage improves safety, increases storage efficiency, and makes daily life more convenient. Whether you’re preparing for a home improvement project, reclaiming parking space, or simply reducing clutter, following this ultimate garage cleanout checklist can help you achieve lasting results.